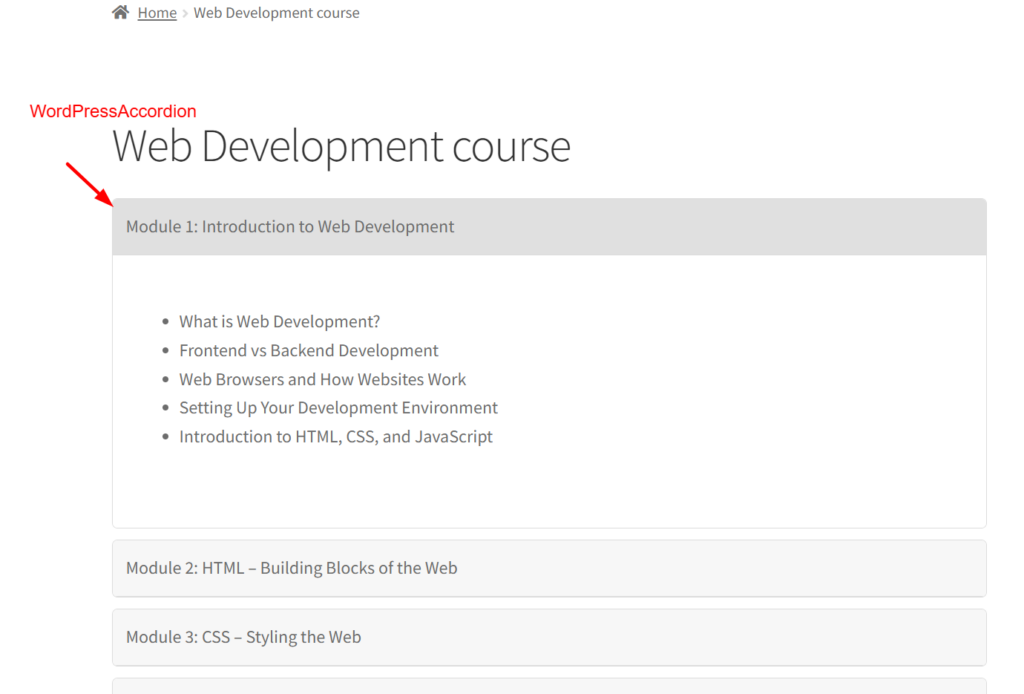
Have you ever wanted to neatly organize content on your WordPress site without making the page look too cluttered? That’s where accordions come in! They let you hide and reveal sections of content with a simple click, making your site look clean and easy to navigate.
In this step-by-step guide, I’ll show you how to create a WordPress Accordion using just a little HTML, CSS, simple JavaScript with no jQuery or Libraries, and PHP. And the best part? You’ll be able to add it anywhere on your site using a simple shortcode! Let’s get started.
Step 1: Creating the Plugin Folder & Files
To start, navigate to your WordPress plugin directory:
wp-content/plugins/
Create a new folder named: custom-accordion
Inside this folder, create the following three files:
- custom-accordion.php (Main plugin file)
- accordion.js (JavaScript for toggle functionality)
- accordion.css (CSS for styling)
Step 2: The Main Plugin File(custom-accordion.php)
This file initializes the plugin, enqueues scripts, and defines a shortcode for the accordion.
<?php
/**
 * Plugin Name: Custom Accordion for WordPress
 * Plugin URI:  https://yourwebsite.com
 * Description: A lightweight JavaScript accordion for WordPress blocks.
 * Version:     1.0
 * Author:      Your Name
 * Author URI:  https://yourwebsite.com
 * License:     GPL2
 */

if (!defined('ABSPATH')) {
    exit; // Exit if accessed directly
}

// Enqueue JS & CSS
function custom_accordion_scripts() {
    wp_enqueue_script(
        'custom-accordion-js',
        plugin_dir_url(__FILE__) . 'accordion.js',
        [],
        null,
        true
    );

    wp_enqueue_style(
        'custom-accordion-css',
        plugin_dir_url(__FILE__) . 'accordion.css'
    );
}
add_action('wp_enqueue_scripts', 'custom_accordion_scripts');

// Create [custom_accordion] shortcode
function custom_accordion_shortcode($atts, $content = null) {
    $atts = shortcode_atts([
        'title' => 'Accordion Title',
    ], $atts, 'custom_accordion');

    return '<div class="accordion">
                <div class="accordion-title">' . esc_html($atts['title']) . '</div>
                <div class="accordion-content">' . do_shortcode($content) . '</div>
            </div>';
}
add_shortcode('custom_accordion', 'custom_accordion_shortcode');
Step 3: Javascript code for Functionality (accordion.js)
This script adds the toggle functionality to the accordion sections.
document.addEventListener("DOMContentLoaded", function () {
    document.querySelectorAll(".accordion-title").forEach((title) => {
        title.addEventListener("click", function () {
            let content = this.nextElementSibling;

            this.classList.toggle("active");

            if (content.style.maxHeight) {
                content.style.maxHeight = null;
            } else {
                content.style.maxHeight = content.scrollHeight + "px";
            }
        });
    });
});
Step 4: Styling the Accordion (accordion.css)
This file adds the required styles to the accordion.
.accordion {
    border: 1px solid #ddd;
    border-radius: 5px;
    overflow: hidden;
    margin-bottom: 10px;
}

.accordion-title {
    background: #f7f7f7;
    padding: 12px;
    font-size: 16px;
    cursor: pointer;
    border-bottom: 1px solid #ddd;
    transition: background 0.3s;
}

.accordion-title:hover,
.accordion-title.active {
    background: #e0e0e0;
}

.accordion-content {
    max-height: 0;
    overflow: hidden;
    transition: max-height 0.3s ease-out;
    background: white;
    padding: 0 12px;
}

.accordion-content p {
    padding: 12px 0;
}
Output
Here’s how you can structure your content of the accordion using the accordion shortcode:
[custom_accordion title]
[/custom_accordion]


